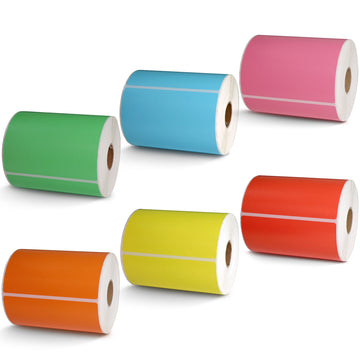
How to print address labels from Word, Excel, Google Sheets

Printing address labels isn't just a mundane task; it's an opportunity to professionalize your mail and save invaluable time. For small business owners and home office warriors, the crisp appearance of a properly printed label not only streamlines your mailing process but also casts a polished, reputable image for your brand. From crafting that perfect first impression to expediting bulk mailings, mastering the art of label printing is essential. Using accessible tools like Microsoft Word and Excel, or Google Sheets, this guide is tailored to facilitate a straightforward process for creating and printing your address labels, ensuring your mailings are as efficient as they are impressive.

A. 6 Steps to Print Address Labels from Microsoft Excel
  Step 1.Preparing Your Excel Spreadsheet
  Step 2.Setting Up MS Word for the Mail Merge
  Step 3.Linking Excel Data to Word
  Step 4.Inserting Address Fields on Your Labels
  Step 5.Previewing and Printing Your Labels
  Step 6.Final Steps
B. Hack for How to Print Address Labels from Microsoft Excel
  What You Will Need:
  Printing Labels:
  Tips for Success:
C. Step-by-step Guide to Print Address Labels in Google Sheets
  Step 1: Prepare Your Data
  Step 2: Install a Google Sheets Add-on for Printing Labels
  Step 3: Configure Your Labels in the Add-on
  Step 4: Preview Your Labels
  Step 5: Print Your Labels

A. 6 Steps to Print Address Labels from Microsoft Excel

For this guide, we are assuming you're using Microsoft Excel and Word to print on pre-cut Avery compatibe address labels (such as Avery 5160, 5161, or 5167).

Step 1.Preparing Your Excel Spreadsheet

  1. Open your Excel spreadsheet that contains the addresses.
  2. Ensure the addresses are well-organized and each piece of information (like name, street address, city, etc.) is in a separate column.
  3. Save your Excel document if you've made any changes.
Prepare Your Excel Spreadsheet

Step 2.Setting Up MS Word for the Mail Merge

  1. Open Microsoft Word.
  2. Go to the "Mailings" tab on the ribbon.
  3. Click "Start Mail Merge" and then choose the "Labels" option.
  4. In the "Label Options" dialog, find the Avery code that matches your labels. For example, select "Avery US Letter" from the list and choose "5160" if you're using that type.
  5. If your label dimensions are not listed, click "New Label" and input your label's specs.
Label Options

Step 3.Linking Excel Data to Word

  1. In the "Start Mail Merge" group, click on "Select Labels."
Link Excel Data to Word
    1. Choose "Use an Existing List…" and then locate and open your Excel file. You might be prompted to select the specific worksheet containing your addresses; do so if needed.
      Use an Existing List
    2. Your Excel spreadsheet is now connected to your Word document.
    choose address list

      Step 4.Inserting Address Fields on Your Labels

      1. In Word, on the first label template, click "Insert Merge Field."
      2. Select the fields from your Excel spreadsheet in the order you want them to appear on your labels.
      Mail Merge Recipients
      1. Adjust the formatting as needed (font size, bold, etc.) since this template will apply to all your labels.
        Insert address block

        Step 5.Previewing and Printing Your Labels

        1. To see how your labels will look, click "Preview Results" in the Mailings tab.
        2. Make any necessary adjustments if things don't look quite right.
        3. Once you're satisfied with your preview, click "Finish & Merge" and select "Print Documents…" to proceed.
        4. In the Print dialog box, choose your printer. Make sure it's set to print on labels and the proper settings for your inkjet or laser printer are selected.
        5. Select the range of addresses to print—whether you're printing the entire batch or only a certain page.
        6. Load your sheets of Avery labels into the printer as directed by the printer manufacturer. It's usually recommended to use the manual feed tray for label sheets.
        7. Click "Print" to start printing your labels.
        preview labels results

        Step 6.Final Steps

        1. Once printed, carefully remove the labels from the sheet.
        2. Affix them to your envelopes or packages, ensuring they are straight and firmly attached.

        By following these steps, you can quickly and effectively produce high-quality address labels using Avery standard templates from your Excel data on a Windows 10 system.

        B. Hack for How to Print Address Labels from Microsoft Excel

        What You Will Need:

        • Microsoft Word (the presented steps are generally applicable to recent versions).
        • Printer with sufficient ink/toner.
        • Blank label sheets compatible with your printer.
        • Sender’s name and return address.
        • Recipient’s name and address.
        • Company logo file (optional).

        Printing Labels:

        1. Open Microsoft Word: Start by launching Microsoft Word on your computer
        2. Access Mailings Tab: Once you have Word open, locate the `Mailings` tab on the ribbon menu at the top of the screen.
          Access Mailings Tab
        3. Start the Mail Merge: Click on `Start Mail Merge` and from the dropdown menu select `Labels`. This action will bring up the `Label Options` dialogue box.
        4. Set Label Options: In the `Label Options` dialog, choose the brand and type of the label sheets you are using. Make sure you select the product number that matches the number on your box of label sheets. Confirm that the printer information is correct, typically either a page printer or continuous feed.
          Set Label Options
        5. Create New Document: Once you have selected the correct label layout, click on `New Document`. Word will create a new document that displays a table that mimics the layout of your labels.
        6. Insert Label Content: In the first cell of the new document's table, input the sender's name and return address at the top. If you want to include a company logo, you can insert it above or beside the sender’s details.
        7. Insert Recipient’s Details: Below the sender's information, type out the recipient's name and full address.
        8. Complete the Mail Merge: Head back to the `Mailings` tab and select `Finish & Merge`.
        9. Print Documents: Choose `Print Documents` from the dropdown menu. A dialogue box will appear, allowing you to select which records to print—if you're printing multiple labels, ensure you've set up your document accordingly. For a single label, you can choose ‘Current record.’
        10. Review and Print: Before sending your labels to the printer, it's advisable to check the print preview to confirm that everything looks good and is properly aligned.
        11. Load Labels and Print: Prepare your printer by loading your sheets of labels according to the manufacturer's instructions, often face down in the paper tray. Once loaded, proceed to print your labels by clicking on the `Print` button.

          Tips for Success:

          • For a sheet of identical labels, set up the first label and then use the 'Update Labels' button in the Mailings tab to replicate the design across the entire sheet.
          • Always run a test print on a regular piece of paper to ensure proper alignment before printing on label sheets.
          • If alignment issues occur, make adjustments in Word or with your printer settings (such as choosing a different paper type or adjusting the tray).
          • Save your label file for future use, especially if you'll be sending to the same recipients or using the same return address.

          Remember, different versions of Microsoft Word might have a slightly different interface but should follow a similar process.

          C. Step-by-step Guide to Print Address Labels in Google Sheets

          Step 1: Prepare Your Data

          Before you begin printing, ensure that your mailing list data is organized correctly in Google Sheets. This typically includes fields such as:

          • Name
          • Address Line 1
          • Address Line 2
          • City
          • State/Province
          • Postal Code
          • Country

          Each entry should be placed in its own cell, under the appropriate column heading.

          Prepare Your Data in Google sheets

          Step 2: Install a Google Sheets Add-on for Printing Labels

          To print labels directly from Google Sheets, you will need to use an add-on that's designed for creating and printing labels. Here are the steps to install an add-on:

            1. Go to the 'Add-ons' menu in your Google Sheets.
            2. Select 'Get add-ons'.
            3. Search for 'labels' and browse through the options available.
            4. Choose an add-on that suits your needs, click on it, and then click the '+ Free' button to install.
            5. Follow the prompts to grant the necessary permissions for the add-on.

              Step 3: Configure Your Labels in the Add-on

                1. Open the add-on within Google Sheets (usually available in the 'Add-ons' menu).
                2. Select the label type or size that matches the labels you'll be using for printing. Add-ons typically support standard label sizes compatible with popular label sheet brands.
                3. Align your Google Sheets columns with the label fields. The add-on should allow you to map each column in your spreadsheet to a part of the address label.
                4. Customize any additional settings according to your preferences, such as font size, label margins, or spacing.
                Configure Your Labels in the Add-on

                  Step 4: Preview Your Labels

                  Before printing, most add-ons provide a way to preview your labels. Use this feature to make sure everything appears correct and is formatting properly.

                    1. Preview each label to confirm the alignment and layout.
                    2. Ensure all text is within the confines of the label edges and is readable.
                    3. If any adjustments are required, go back and tweak your settings accordingly.
                      Preview Your Labels

                    Step 5: Print Your Labels

                    Once you are satisfied with the preview:

                    1. Insert the blank label sheets into your printer according to the printer's specifications.
                    2. Navigate to the print function within the add-on.
                    3. Select your printer and adjust any print settings if necessary.
                    4. Print a test page (if possible) to ensure that the labels print correctly on the sheet.
                    5. If the test page comes out well, begin printing your complete set of address labels.
                    6. Remember to save your workspace within the add-on if you plan to print more labels in the future or need to reprint certain labels.

                    Conclusion

                    As our guide comes to a close, it's clear that the tools at our disposal for printing address labels – Microsoft Excel, Word, and Google Sheets – stand to greatly simplify and enhance our labeling tasks.

                    These platforms are not just powerful and efficient; they are crafted with the user in mind, ensuring that anyone can take on their labeling projects with confidence.


                    Learn More Faqs about How to Print Address Labels

                    What is the most cost effective way to print labels?

                    The most cost-effective way to print labels, considering that durability against water, heat, or chemicals is not required, is to use a direct thermal printer. Direct thermal printing does not require ink, toner, or ribbons, which lowers the ongoing supply costs. It's ideal for applications where labels are used for short durations such as shipping labels, receipts, or name tags.

                    Can I use my regular printer to print shipping labels? 

                    Yes, you can use your regular printer—whether it's an inkjet or laser printer—to print shipping labels. Both types of printers are capable of handling the common size of 4x6 inches for shipping labels.

                    Is there an address label template in Word?

                    Yes, there is an address label template in Word for Avery 5160 address labels.

                    1. Open Microsoft Word on your computer.
                    2. Click on the 'Mailings' tab on the ribbon.
                    3. Choose 'Labels' from the toolbar.
                    4. In the Envelopes and Labels window, click on 'Options'.
                    5. Under the Label Vendors dropdown, select 'Avery US Letter'.
                    6. Scroll through the Product Number list and select '5160'.

                    Can you print address labels directly from Excel?

                    Yes, you can print address labels directly from Excel. Here's how:

                    1. Open your Excel document containing the addresses.
                    2. Select the data you want for labels, including headers.
                    3. Go to "Mailings" tab, click "Start Mail Merge" > "Labels".
                    4. Choose your label type in "Label Options" and click "OK".
                    5. Use "Insert Merge Field" to place Excel data on labels.
                    6. Preview your labels to ensure correct layout.
                    7. For printing, click "Finish & Merge" > "Print Documents".
                    8. In the "Merge to Printer" box, adjust settings and click "OK" to print.

                    Remember to have your label sheets correctly loaded into your printer!