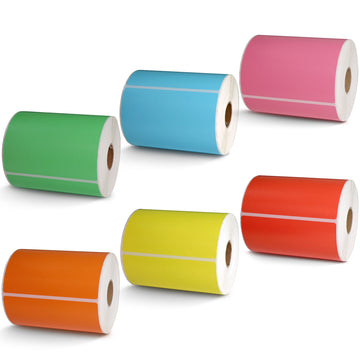
Removable Film Labels
|
|
Time to read 6 min
Betckey's independently developed printer brand ILabel Desktop Printer has been on the market for a while . We have introduced the printer in our last blog. Today, we'll address this issue. We'll cover three aspects: how to install the ILabel driver on Windows or Mac, how to print labels from a computer or phone, and how to batch print labels. You can also download the user manual to get more information. Let’s get started!
Table of Content
1. Connect Your ILabel Printer to computer via USB.
2. Open the download page . Click Download Windows Drive .

3. Select USB connection method.

4. Choose your ILabel Printer
 Choose your ILabel Printer picture
5. Specify the printer name.
6. The installation is done.

1. Connect Your ILabel Printer to computer via USB.
2. Open the download page . Click Download Mac Driver .
3. Open System Preferences, and click on Security & Privacy .(lf you don't see the warning , skip this step)
4. Click on Open AnyWay button. (lf you don't see the warning, skip this step)

5. Click on Open

6. The computer automatically turn to Introduction page and click Continue.

7. The computer automatically turn to Destination Selection page and click Continue.

8. The computer automatically turn to Installation type page and click Continue.

9. The installation was successful.

10. Open "System Preferences">>click on "Printer and Scanners".

11. Click " + " to add a new printer.

12. Click on Thermal Label Printer , and choose "Select Software" in the drop down menu.

13. Choose Label Printer,click OK .

14. Click Add , now the printer has been installed in your Mac successfully.

The ILabel printer doesn't come with a built-in design app for creating your labels. However, like most label printers, you can use Word, Excel, or other applications to customize your labels. You can also print pre-prepared PDFs.
You can print labels from the ILabel printer using either a computer or a phone. Next, we'll show you how to print labels from both devices.
1. Load the label roll.
2. Connect the computer with your ILabel printer via USB. Make sure the two devices are connected to the same WiFi.
3. Open the pre-prepared PDF/document/Label you need to print.
4. Choose your ILabel Desktop Printer.
5. Select numbers to print.
6. Click Properties.

7. Select Default Paper type.

8. Set up the other dimensions and check for confirmation.
9. Click on Print and we are done!
1. Download Label Export App via Google Play Store (Android) or APP Store (Apple). Or scan the QR code below to download the APP.

3. Connect your phone with your ILabel printer via bluetooth. Make sure the two devices are connected to the same WiFi.
4. Tap the printer icon on the top right and select your model.
5. To print PDF, tap PDF print and select your file. If not, please go to the next step.
6. To print an image, tap image print and select your image. If not, please go to the next step.
7. You can also scan print a label. Just tap Scan print and scan the label or file to print. If not, please go to the next step.
To customize your design, tap New label .

On this screen, you have two ways to customize labels.
1) Select the pre-installed label size and design your label.
a. Tap Change the label size to select the label size needed and click New from the label paper .
b. Select a label shape form Mine, Rectangle or Circle
c. Begin to customize your label content. You can add text, barcode, QR code, or line, etc. To meet your needs.
d. Click print or save it to print later.
2) Customize the label size on your own.
a. Tap Custom label
b. Fill out the label name.
c. Select label shape
d. Select the label width and height.
e. Select columns to split to and the background if any.
f. Tap Create and begin to customize your label.
g. Click on P rint or save it to print later.
Betckey is dedicated to becoming a one-stop thermal label provider, addressing a wide range of printing needs, from labels to printers. Over the years, Betckey has been focusing on producing thermal labels. Now, after years of development, Betckey finally introduces its first comprehensive printer at competitive prices, filling a gap in our product line. This marks a significant step toward realizing Betckey's one-stop solution vision.
Users of Betckey labels now have a new printer option, which will definitely enhance the compatibility between Betckey labels and label printers. Your concerns about using Betckey labels with other printers will soon be a thing of the past.
1. Open MS Word.
2. Click on Mailings and click on Labels on the toolbar.
3. A property page automatically pops out and click on Options .

4. The Label options page pops out.

5. Click on New label to create your address or shipping labels.

6. The Label details page pops out. Set up the label height and width, number across or down, and other dimensions, and click OK .

7. The page pops back to the Label Options page. Click OK and Cancel .
1. Click the Star Mail Merge and click Labels .

2. The Label options page pops out. Select the label you just set up and click OK .

3. Click Star Mailing Merge and click on Labels .

4. Choose the label you just set up.
 Choose your ILabel Printer picture
5.The label comes onto the screen.

6. To export all the data from your Excel sheet, click Select Recipients and Use an Existing List .

7. The Select data source page pops up. You can select recipients from the Excel you have exported from your system like Shopify.

8. Select Table with the data needed.

9.To emerge the customer data, click on Insert Merge Field and select A .

10. Click Preview Results to check data in the A column of your customer data table.

11. Continue to click Insert Merge Field to add B column on your label.

12. Continue to click Insert Merge Field until all the data needed to merge are added to the label.
13. Change the color, font, size or position of the data as needed.

14. Go back to Mailing and click Check for Errors to see if all the data are properly added.

1. If everything is okay, print the labels.
Note: to avoid label skipping, save the document as PDF .
Click File>Save as>Save the document as PDF
2. Open the PDF you just saved.

3. Click Menu>Print

4. Select the paper size. Click Page Setup and select label size.

5. click Fit to make sure the content of the label is placed on the right position
6. Click Print and we are done!

8. Set up the other dimensions and check for confirmation.
9. Click on Print and we are done!
Common printer features like print speed, connectivity, and usage methods are already widely covered in other reviews, so we’ve chosen to skip those here. Instead, we clearly listed the difference among different models. We also talked about what makes Brother QL series models simple to use. We hope this article provides helpful insights for choosing the right model. If you want to get more information about labels and printers, please check out our website .
About Betckey
Betckey Premium Labels is a leading supplier of compatible direct thermal labels, committed to high-quality and eco-friendly products as well as competitive pricing. We offer better products than manufactured original at 70% less price. Now, our Amazon store ranks first in the US, Canada, and Western Europe with thousands of positive ratings. Visit betckey.com and get 10% off purchases over $150 with code Betckey10 and 15% off over $400 with code Betckey15! Sign up now and we'll send you a $5 discount code towards your first purchase. By the way, welcome to follow our official @ Tik Tok and @ Youtube accounts to get Betckey’s latest news!
If you want to buy thermal labels or sticker paper, you can check out more on our store