Mailing labels make the shipping experience smoother for businesses that rely on multiple postal deliveries for customer orders or mailing out Christmas cards to customers, whether that means monthly billing statements to customers, perfume for customer orders or Christmas card sets.
From printing out on your computer to using dedicated label printers - the right labels ensure packages arrive safely with all relevant information clearly displayed so as to ensure accurate delivery.
Mailing labels have become indispensable tools in modern e-commerce landscape. In this guide, we explore new trends within shipping labels as well as offer tips on how best to create and utilize them effectively.
Mailing label templates
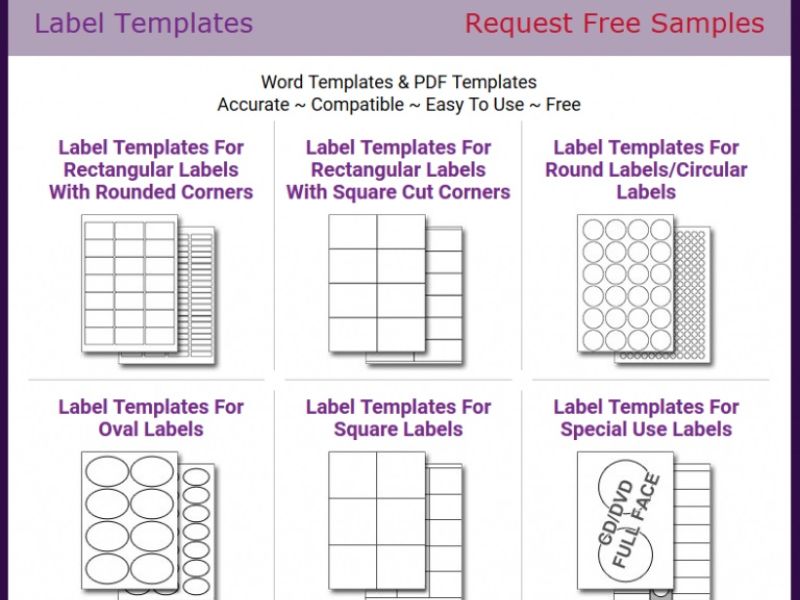
If you need to create many labels quickly for mailing, shipping or other purposes, using a label template could save time. There are various templates available online for downloading and use as well as some built into certain office suites; you can select from various styles, colors and formats, while customizing the text according to what kind of labels you need to make.
Microsoft Word templates
They make label creation quick and easy, or download one compatible with the type of labels you have. Avery offers free label templates for each configuration of its labels. Use the search box in the upper right-hand corner of their website to quickly locate them. Alternatively, search by specific categories, like business or holiday, if that suits your search more effectively.
Avery label templates
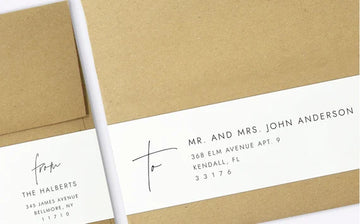
Free label templates available from Avery include various styles. There are wraparound address labels, square and circular labels, as well as themed address labels like Christmas or fall themes. If you need to make any edits to text color, font size or layout changes on a label simply use the "Edit" button and click directly on that label for editing purposes.
Photoshop or Inkscape
One way of creating labels yourself is by using a graphic design program such as Photoshop or Inkscape, then printing them directly on paper using regular printer settings. This method works particularly well if you prefer avoiding label sheets. Alternatively, an alternative word processor such as WPS Office could also help.
PDF file
For other label templates, a PDF file can be easily obtained online from websites or programs compatible with the formats that you have. Universal file formats like this make sharing and editing them simpler than ever! For additional ease in editing these types of labels, Adobe Acrobat compatibility makes sharing simple as well.
If you use a blank label template to format the labels you plan to print, be sure to name them so as to keep track of their contents. An ideal approach would be to give each one an easily remembered name (such as an event or project). Once named, save this document with something simple.
The use of a label template is an effective way to ensure that all the information printed on each label fits seamlessly. Furthermore, using such templates saves you time, as no guesswork needs to be done when placing texts and images on each label. Turn on gridlines so you can clearly see where each label should go!
How to create mail labels for xmas cards?
Christmas cards are an easy and timely way to show our friends and families that we care. Sending one just takes minutes!
Before printing your labels, it is advisable to perform a test print to ensure proper alignment and address any potential issues with the mail merge template.
Choose your template
With Christmas rapidly approaching, now is the time to consider adding the final touches to all your holiday correspondence and packaging. Word's Mail Merge tool offers an effective solution. Create Christmas address labels using Word, and you will make an impressive statement that you care.
Saving you hours, this tool makes life much simpler by allowing you to enter all your addresses at once and print them directly onto label sheets. Plus, you can order exactly the right size and material online.
Add extra design features to your labels, such as pictures or company logos, to make them more personal. Don't forget to do a test print first and ensure they all line up before going ahead and printing them all at once!
HGTV offers an excellent collection of Christmas label templates to provide some much-needed inspiration, from traditional designs to festive ones that fit all types of envelopes. Plus, there's even something here just for the kids!
Add addresses
Starting off by printing out a draft set of labels on plain paper is always wise.This helps verify both their addresses are accurate and that your labels will print correctly on label stock.
Word's Mail Merge tool is the fastest and simplest way to do this by merging a label template document and address records into one comprehensive database that produces personalized labels for every member of your mailing list.
To use the Mail Merge Wizard, first select your starting document and click on "Mailings" at the top of your screen. From here, choose "Start Step-By-Step Mail Merge Wizard," which will guide you through each of its six steps to successfully completing a mail merge (allowing you to correct any mistakes along the way).
Design your labels
With just a few steps, your labels are ready for printing. Plus, with the "Preview another label" or "Find a recipient" options, you can double check that all addresses fit seamlessly within the chosen design.
Simply click "Update All Labels" in the Mail Merge pane to instantly add your design to each label, though this step isn't strictly necessary. Rather, it simply makes your job faster.
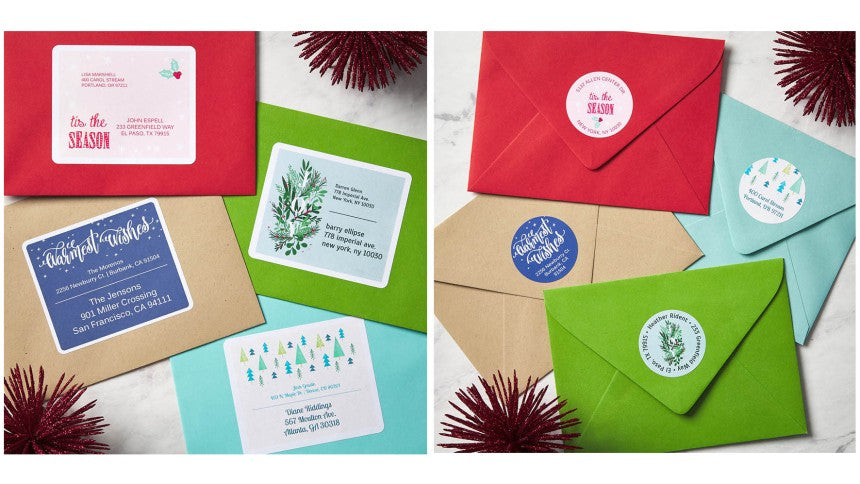
Add festive designs to address and return address labels for an added festive touch, not forgetting all of the shapes, sizes, materials, and styles available - from special shapes, sizes, and materials to Sure Feed technology that avoids paper jams or misalignment when printing - perfect for businesses sending numerous cards and packages out!
Once your labels are complete and any addresses have been updated, it's wise to perform a test print (using an array smaller than that on your label sheets) in order to make sure their positioning and design work well before printing for real.
In addition, use the "Preview another label" and/or "Find a recipient" options in your database to make sure that they work for all records - some might contain addresses that extend past the edge of their labels, requiring you to perform further checks.
After selecting File > Print from the main menu or using Command & P as your keyboard shortcut, make sure that the correct printer type (e.g. Avery label numbers) and settings have been set up on your printer correctly before starting printing.
Also, consider turning off grid lines in tables (TABLE TOOLS > Gridlines menu) in order to reduce distracting horizontal and vertical white space in tables.
How to print mailing labels from excel?
Printing labels from Excel is an effortless and quick process, provided you have a spreadsheet containing the names and addresses to print.
Launch Word and link it with the worksheet you created, selecting your label format of choice before inserting a database field into the Label Text Box.
Using the Mail Merge feature
No matter if it's for Christmas greetings or home events, Mail Merge makes printing addresses on labels or cards easy. Utilizing this feature allows you to use Excel contacts and print them directly onto label paper - making the process more efficient when mailing large lists as it ensures data mapping to Word's label template is correct.
Begin by organizing your Excel label list properly, including creating a spreadsheet with clear column headers corresponding to labels in an organized fashion. This will aid in accurately mapping data later when it's imported into Word for mail merge processing.
Establish a Word document and select Labels under the Mailings tab. From the Label Information dialog box, choose the vendor/product number combination before clicking Next.
Using a template
Producing labels using text from a spreadsheet can be both time-consuming and complex, but there are several steps that can make the process quicker and more accurate.
A template may save both time and effort while guaranteeing the consistency of labels across your designs. Likewise, Excel provides filtering features that help organize data prior to being imported into Word.
When printing labels, be sure to select the appropriate paper size and orientation, as well as margin settings, to avoid overlap and distortion. In addition, printing a test label before final printing gives you an opportunity to review it and make any necessary adjustments before going forward with your final order.
Lastly, using formatting options to enhance their look will help them look more professional while drawing attention.
Using a database
If your database includes customer or prospect contact information, using it to print label sheets for mailing is simple. Simply create an Excel spreadsheet containing columns titled Name, Address, Zip Code and Phone Number then add data to each of those cells before importing it into Word using the Mail Merge feature.
Use an empty template or create one from scratch by using the Mailings tab on the Ribbon and starting Mail Merge, selecting Labels as your Document Type list and finally entering Label Options dialog box for more customizations based on vendor and product number selections.
Once you have selected a label vendor and product number, click OK. This will bring up the labels page of your document, where you can select "Page Printers" in the left pane and choose your default tray, or click the Format tab if any additional settings need to be specified.
Using a spreadsheet
When creating mailing labels, using Word's Mail Merge feature is the easiest and quickest way. By connecting an Excel spreadsheet with a Word document, this feature enables you to use customer details from their addresses to creating labels for mailing lists. Furthermore, macros allow for automated conversion of spreadsheets into label templates.
Utilizing a dedicated label printing program can also save both time and effort, enabling you to set text size, font type, and text alignment accordingly - saving both precious minutes!
Before beginning any mail merge process, ensure your data file contains the appropriate headers in its first row. Headers control how your column headings appear in label documents; each header corresponds with a merge field in a Word document - for example, if "Name" appears as your first header, then its counterpart in Word will be "AddressBlock>>".
Mail merge labels from excel
Before we get started, it is crucial that we compile our label data list in Excel. Make sure your spreadsheet is formatted appropriately, with columns aligning to fields in your label template (for instance First Name, Last Name, Address City State ZipCode etc). Also, consider sorting or filtering to quickly locate and select records needed for label merging.
Once your label data has been prepared, Word makes the merge easy to begin. Simply open your desired document, navigate to its Mailings tab, and click Start Mail Merge.
From the Step by Step Mail Merge Wizard select Labels as the starting document with dimensions from the drop down list for dimensions & vendor selection if your labels don't come from one supplier - otherwise, change as necessary if labels come from different suppliers.
Once printed, your labels will feature an AddressBlock>> placeholder that can be filled out using actual data from an Excel sheet. If additional placeholders are desired for different fields in spreadsheet, simply repeat the process for each. When finished, simply use the Update All Labels link on Mailings tab to complete merge process and view and print labels.
If you wish to make further modifications to your labels, use the Home tab and design them according to your preferences. Once complete, go back to the Mailings tab and use Preview Results link to preview how they will look when printed.
Once your labels are perfect, it's time to print! Make sure that there are enough blank labels for all those on your list, and they are in an orderly manner, before pressing Print. Save and access them easily when needed in the future for future printings!