Connecting a Brother label printer to your computer is a straightforward process. Start by unboxing the printer and setting it up by loading the label roll or tape and connecting the power cord. For a USB connection, plug the USB cable into the printer and your computer, then install the necessary drivers and software from the Brother support website. For a wireless connection, install the Brother software on your computer, enable Wi-Fi on the printer through its network settings menu, and connect the printer to your Wi-Fi network by selecting your network and entering the password. Once connected, install the drivers and software, choosing the Wi-Fi option during setup. Verify the connection by opening the Brother label printing software, creating a test label, and printing it. Ensure the printer is listed in your computer’s printer settings and set as the default printer if needed. If you encounter issues, check cable connections, update drivers, restart devices, or try different USB ports. By following these steps, you can efficiently connect your Brother label printer to your computer for seamless label printing.dk 1201 labels
Carefully remove your Brother label printer from its packaging. Ensure you have all the components, including the power cord, USB cable (if provided), and any starter label rolls or tapes.
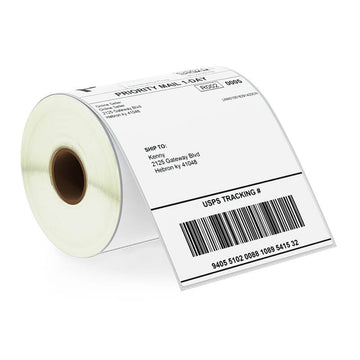
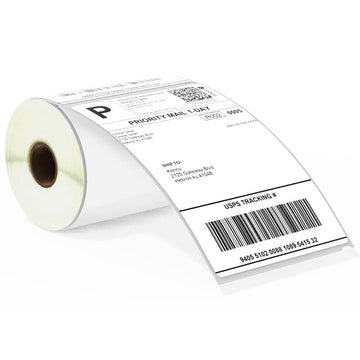
Load the Label Roll or Tape :
Open the label compartment of the printer.
Insert the label roll or tape cassette according to the instructions provided in the user manual.
Ensure the labels are properly aligned and the tape is threaded correctly.
Connect the Power Cord :
Plug one end of the power cord into the printer and the other end into an electrical outlet.
Turn on the printer using the power button.
Step 2: Connect to Your Computer
Option 1: USB Connection
Locate the USB Port :
Find the USB port on the back of your Brother label printer.
Connect the USB Cable :
Plug one end of the USB cable into the printer and the other end into a USB port on your computer.
Install Drivers and Software :
If prompted, follow the on-screen instructions to install the necessary drivers and software.
If not prompted, visit the Brother website and download the latest drivers and software for your printer model.
Before starting the wireless setup, install the Brother software package on your computer. You can download it from the Brother support website.
Activate Wi-Fi on the Printer :
On the printer, access the network settings menu. This process varies by model, so refer to your printer’s manual for specific instructions.
Select the option to enable Wi-Fi and follow the prompts to connect the printer to your wireless network.
Connect the Printer to Wi-Fi :
Using the control panel on your printer, choose your Wi-Fi network from the list of available networks.
Enter your Wi-Fi password and confirm the connection.
Install Drivers and Software :
Once the printer is connected to your Wi-Fi network, install the drivers and software on your computer if you haven't already.
During installation, choose the option to connect via Wi-Fi. Follow the on-screen instructions to complete the setup.
Step 3: Verify Connection
Open Brother Software :
Launch the Brother label printing software on your computer (e.g., P-touch Editor).
Print a Test Label :
Create a simple label design and print a test label to ensure the printer is functioning correctly.
Check Printer Status :
Go to your computer’s printer settings to verify that the Brother label printer is listed and set as the default printer if necessary.
Troubleshooting Tips
Ensure Proper Cable Connections : Double-check that all cables are securely connected.
Update Drivers : Make sure you have the latest drivers installed. Download them from the Brother support website if needed.
Check Wi-Fi Settings : For wireless connections, ensure the printer and computer are on the same network.
Restart Devices : Sometimes, restarting your printer and computer can resolve connectivity issues.
Conclusion
Connecting your Brother label printer to your computer is a straightforward process that can significantly enhance your productivity. Whether using a USB or wireless connection, following these steps will ensure a smooth setup. Enjoy the convenience of efficient and professional label printing right from your computer.
By understanding and implementing these steps, you can seamlessly integrate your Brother label printer into your workflow, making labeling tasks easier and more efficient.dk 2205 labels
What should I do if my Brother label printer is not recognized by my computer?
Answer :
Check Connections : Ensure that all cables (USB or power) are securely connected. If using a wireless connection, make sure the printer is connected to the correct Wi-Fi network.
Update Drivers : Download and install the latest drivers from the Brother support website. Outdated or missing drivers can cause connectivity issues.
Restart Devices : Restart both your printer and computer. Sometimes, a simple reboot can resolve recognition issues.
Use a Different USB Port : If connected via USB, try using a different port on your computer to rule out port-specific issues.
Check Printer Status : Go to your computer’s printer settings to see if the printer is listed. If it’s listed but not functioning, try removing and re-adding the printer.
How do I connect my Brother label printer to a Wi-Fi network?
Answer :
Install Software : Before starting, download and install the Brother software package from the Brother support website.
Activate Wi-Fi : On the printer, access the network settings menu. Refer to your printer’s manual for specific instructions.
Connect to Wi-Fi : Choose your Wi-Fi network from the list of available networks on the printer’s display. Enter the Wi-Fi password when prompted.
Install Drivers : On your computer, run the Brother software installation and select the option to connect via Wi-Fi. Follow the on-screen instructions to complete the setup.
Verify Connection : Ensure the printer is connected by printing a test label or checking the printer status in your computer’s printer settings.
What software do I need to install to use my Brother label printer with my computer?
Answer :
Brother P-touch Editor : This is the primary software used for designing and printing labels with Brother label printers.
Printer Drivers : Necessary for your computer to communicate with the printer. These can be downloaded from the Brother support website specific to your printer model.
Optional Utilities : Brother may offer additional utilities for advanced functions like barcode creation, template management, and network settings. Check the Brother support website for any additional software relevant to your printer model.
Can I use my Brother label printer with both Windows and Mac computers?
Answer :
Yes , Brother label printers are generally compatible with both Windows and Mac operating systems. However, you need to download and install the appropriate drivers and software for each OS.
Windows : Visit the Brother support website, select your printer model, and download the Windows drivers and P-touch Editor software.
Mac : Similarly, download the Mac drivers and software from the Brother support website.
Installation : Follow the specific installation instructions provided for each operating system. Ensure you’re using the correct version of the software for your OS version (e.g., Windows 10, macOS Big Sur).
Love your stuff. What I buy from you. Works great with my Brother Q800 label maker. Except when I ordered the wrong size 😂. Thanks again. I do have a question. Would you like to advertise on my autograph Group. I do have a few members that have a label maker like mine. And you might get even more business because right now I have 1,500 members and growing. Think about it. Autograph HoundS. Go by that name only. As someone else has their first name and then autograph Hounds. Or look me up. Beverly Laura Ford Gamble. I am trying to generate a little extra income for the overall group.
The labels came in the mailer without any instructions, packaging insert, printing template or information about how to print. It was literally just an envelope full of loose labels. This template come with out proper alignment which made me waste so much peper. To avoid the hassle and time involved in locating a print template and sorting through everything, it would have been better to go with a name brand like Avery. I’m super disappointed.
At first I thought I had ordered incorrectly, as the two rolls were wrapped so tightly in black plastic, that I thought either incorrectly ordered or was incorrectly shipped.
Well I opened one, as realized this must have been wrapped this way because of the thermal products ordered.
Product looks good, but not used for printing yet.
It was wrapped well and arrived super fast.